The surface quality of a product’s materials influences its performance. Optical profiling techniques can enhance measurement accuracy in the lab and improve R&D processes for manufacturers, explain Matt Parry and Natalia Bermejo.
When producing any part or product, it is essential that the surface texture and material topography meets the manufacturing specification. If not, it risks performance losses and failures in the part, while the manufacturer might also lose accreditation.
Surface characteristics are integral to how a part interacts with its environment and can influence component behaviour on a micro and nanoscale. A part’s surface characteristics are also important to quality control because they determine some of the component’s main functionalities: adhesivity, contact resistance, biological compatibility, friction and mechanical wear.
In laboratories, surface analysis provides insights into surface coverage, molecular orientation and surface segregation. For manufacturers, surface measurement allows them to understand how products are likely to behave in their intended environments; R&D is critical to product quality.
The right tools
To ensure parts meet the required quality and intended purposes, many manufacturers will measure surface finishing while developing the product. Understanding surface characterisations and geometry means that companies can adapt their manufacturing techniques to guarantee the optimal output, before starting mass production.
Regardless of the product, geometries will vary, so selecting the right measurement tool is essential. For instance, using probes that touch the product or part can compromise surface quality, and even contribute towards rejection during the quality assurance process.
Even the slightest irregularities in surface finish can impact a component’s performance and in highly regulated industries must be eliminated
Optical profiling is, today, the most common choice when checking surface finishes during the R&D stages of manufacturing a product. It enables characterisation, where different surfaces and topographies are quantified and analysed, both natural or manufactured surfaces, without any potentially damaging surface contact, whereas tactile, stylus-based techniques are only suitable for measuring samples.
An all-round view
Even the slightest irregularities in surface finish can impact a component’s performance and in highly regulated industries must be eliminated.
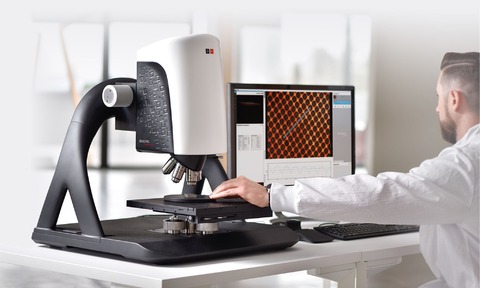
Tools must be capable of measuring surface finish to the nearest nanometre (nm), and laboratories can also benefit from installing such systems. Sensofar’s 3D optical surface profiler uses interferometry techniques for a real surface characterisation, which means it provides a complete view of the entire surface, as well as an optical design that allows the profiler to double the field of view without compromising the resolution.
Combining Phase Shifting Interferometry (PSI), Coherence Scanning Interferometry (CSI) and Extended Phase Shifting Interferometry (ePSI) techniques allow the measurement of a range of surface characteristics.
PSI is best for ultra-smooth and very flat, continuous surfaces, such as those found on optical components. CSI is the most versatile mode, measuring smooth and rough surfaces with 1 nm resolution, and it can also measure transparent layers with thicknesses between 1.5 and 100 microns. Meanwhile, ePSI, which can be understood as a combination of PSI and CSI, measures smooth surfaces with structures, making it perfect for measuring features on wafers.
Interferometry has a high level of repeatability and accuracy, and is faster than some confocal technologies, like laser confocals.
It can be employed to produce topographies with a high number of measured data points to clearly show the surface of intricate components.
Other measurement techniques
Interferometry is just one of the 3D optical metrology methods available to manufacturers, and those working in laboratories. Active illumination focuses variation and confocal technologies. Focus variation is designed for measuring the shape of large, rough surfaces, and is the fastest technology explored here, combining the small depth-of-focus of optical systems with vertical scanning. Topographical and colour information provided can sharpen surface images or measure irregularities.
Focus variation technology allows manufacturers to sharpen images and measure surface irregu-larities by using optics with very little depth of field. A lower depth, or distance, in focus can result in blurry backgrounds and blurred elements in the foreground.
The fact that the focus is limited to certain areas of the sample makes it easier to combine with vertical scanning to create a 3D topography with everything sharpened and in focus. This approach provides repeatable, high resolution 3D measurements that support quality assurance in both production and R&D applications. It can deliver valuable insights into surface roughness for a wide range of engineered parts.
Confocal microscopy is a technique often found in laboratories. With this method, researchers can reject out-of-focus light from the detector that would otherwise blur the image. Confocal profilers have been developed for measuring smooth to very rough surfaces and provide the highest lateral resolution, up to 0.15 um line and space.
Every manufactured part’s performance is influenced by its surface characteristics. That is why optical profiling techniques have a critical role in component development, allowing exploration and development prior to mass production. For manufacturers and laboratories, introducing optical profiling techniques can ensure accuracy without damaging the component. The result is higher-quality, more accurate parts.
Matt Parry is applications engineer at The Sempre Group
Natalia Bermejo is product specialist at Sensofar

